Wednesday, August 14, 2013

Smash & Grab - August 3rd, 2013


June 16, 3064
Bialyian Desert, Carver V

A report from Corporal Johnathon Teach, support staffer of the Second Argyle Highlander Regiment:

We’d been hit hard these past two weeks.  What had been the entire Second Argyle Highlanders regiment protecting the planet has been reduces to just a single lance.  Forced to hide out in the desert, we thought we’d been lucky to find this abandoned germanium mine.  Walled in and located in fairly defensible terrain, we hunkered down to wait for reinforcements, or, if worst came to worst, make a valiant last stand for Prince and nation.

It started at 0837.  That’s when we first detected the short company on long range sensors.  By 0900 we knew that it was more than just a patrol as the started entering visual range.

Sir Nevel Kingston-Brown’s custom Black Knight and Jeff Nemo’s VTR-10D Victor stand guard at the gate while the Lyran forces enter sensor range.

The Lyrans were smart.  They came in from the Southwest, well away from the front gate to the mine complex.  Leftenants Dan Linkan and Markus Nesevo had departed to do a patrol to the north and east to see if they could catch any flankers, leaving Captain Sir Nevel Kingston-Brown and Leftenant Jeff Nemo to guard the complex itself.

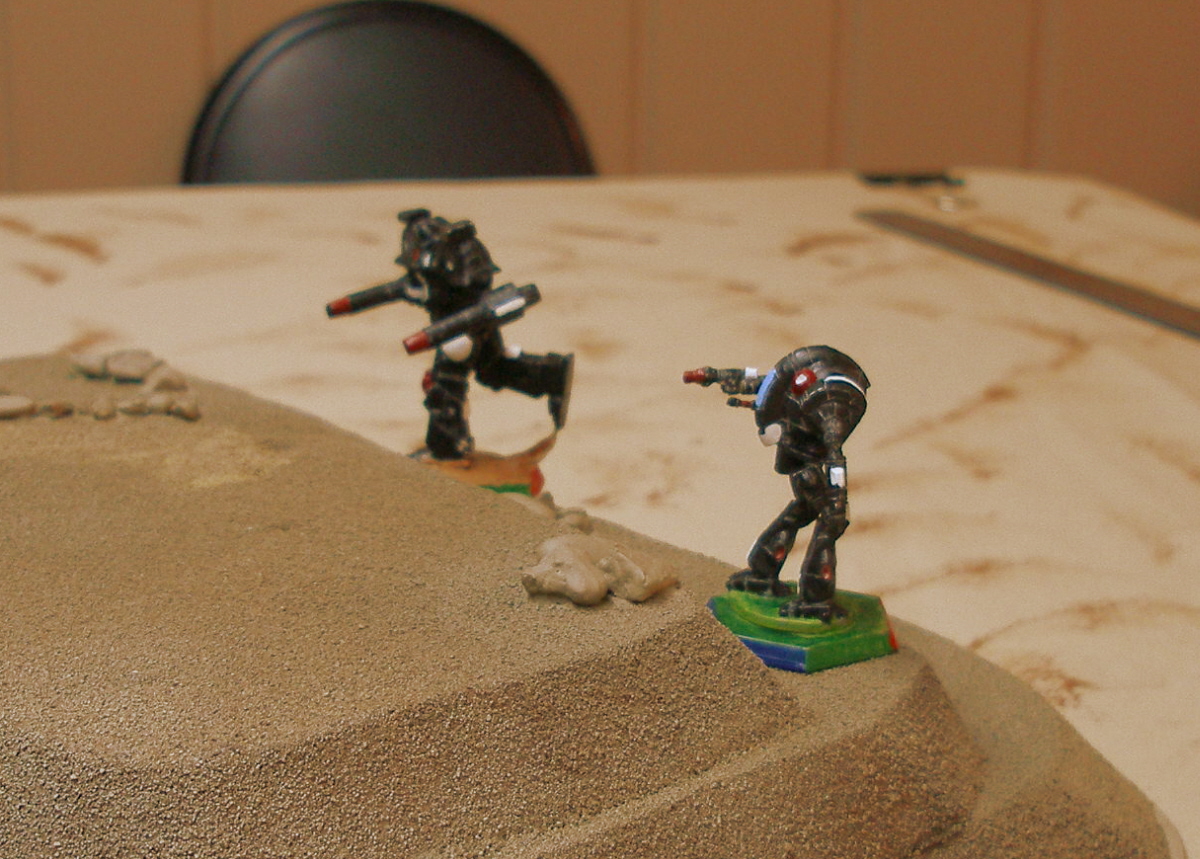
Leftenants Dan Linkan, in a DVS-2 Devastator, and Markus Nesevo, in a CES-3R Caesar, return from a patrol to find the mine under attack.

The Lyrans had split up into two groups.  A lighter, faster scout force that came in south of the small mountain chain that dotted the desert, and a larger, heavier attack force that came in slightly north of them.

The Lyran scout force: Ben Corbett’s WSP-1A Wasp, Kevin Jaeger’s STG-3R Stinger, and Keith Morris’s COM-7S Commando.

The Lyran heavy lance – Brevet Hauptmann Camille Ulffson’s modified Axman, Charles Paine’s BSW-S2 Bushwacker, James Van Elson’s HCT-6S Hatchetman, and First Leutnant Hermes Gherardini’s modified Battlemaster – begin their attack on the mine complex.

Now, Captain Kingston-Brown was no fool.  He knew the only thing that would allow his 'Mech’s to stand up to twice their weight in enemy ‘Mechs was the wall surrounding the complex.  That, and some good-ol’ Davion fire discipline, allowed the two of them to blunt the enemy’s charge and even knock out the lead ‘Mech.


Hauptmann Ulffson’s Axman is the first, but not the last, casualty of the day.

But that’s when things started to go downhill.  We got word from Markus and Dan that they hadn’t start moving yet – apparently they overestimated the max range on the gauss rifles their ‘Mech’s carried.  Then we heard the unthinkable: Jeff’s ultra AC had jammed, the deep thunk of the machine’s ammo feed failing seemed to reverberate throughout the battlefield.  Thinking himself done for, the boy then leapt out of the compound straight into the enemy formation.  Even tried to do a Death From Above on one of the enemy.  Too bad he failed.  Coulda won us the battle right then.

Leftenant Jeff Nemo attempts to DFA the enemy Battlemaster.

Then the Lyrans started getting the idea to jet their own jump-capable ‘Mechs in the base.  First off was one of those little Hatchetman.  Tried to engage Sir Nevel in close combat.  Guess he didn’t count on a Triple-Strength Myomer enhanced sword slicing his ‘Mech neatly in half.

Sir Nevel Kingston-Brown and James Van Elson engage in honorable melee combat inside the mining complex.

Meanwhile, the other half of the Davion force races – as much as a 100-ton ‘Mech can race anyway – to join the battle.

And that’s when Jeff fell, his entire torso completely destroyed by the combined firepower of the rest of the Lyrans.

Jeff Nemo’s Victor falls over, just as the Lyran lights join the fray.


The Lyran Wasp and Stinger jump into the mining compound…


Just in time to see the Hatchetman bite the dust.


Jeff Nemo’s Victor’s entire torso is obliterated by Hermes Gherardini’s Battlemaster.

I guess it was then that Sir Nevel got a little flustered, and the three Lyran lights managed to get shots at his rear armor.  Now, his head had already been hit earlier, stripping it of its armor and damaging the sensors, but then one of those little guys managed to hit what was left, and, well…

The three Lyran lights manage to get back shots on the Black Knight


And manage to destroy the head section, killing Captain Sir Nevel Kingston-Brown.

I thought it was all over when Sir Nevel died, and the Lyrans began shooting at the mine entrance, collapsing it.  But that’s when we heard the unmistakable sound of Gauss rounds and PPC bolts overhead as the big boys got into the fray.

The two remaining Davion BattleMechs enter the fray.

Now, I don’t need to tell you what happens when a 100-ton Devastator attacks a 20-ton Wasp.  I’m pretty sure that thing’s arm flew a good kilometer or so before it landed.  PPCs and gauss rifles can take three lights apart pretty quickly it seems, especially because they decided to go after some mine skips fulla ore rather than skedaddle like bugs should when a big boy comes to play.  I guess that the Lyrans didn’t have too much fight in ‘em after that.  Their last two machines, a Bushwacker and what looked like a modified Battlemaster, had been worn down by trying to deal with Sir Kingston-Brown and Leftenant Nemo and they suddenly found themselves facing two pristine ‘Mechs, both armed with gauss rifles.  Started retreating right then and there, though Leftenants Nesevo and Linkan didn’t even bother trying to chase ‘em down.  Guess they were too worried about Sir Nevel to put any thought into the catching them.

Saturday, July 6, 2013

Battle of Pine Hill, July 6, 1863

Today (July 6, 2013), the Jackson Gamers fought a pair of post-Gettysburg "what if" battles based on a vigorous pursuit by Meade's Army of the Potomac of Lee's Army of Northern Virginia.  I was a Confederate commander of one of the battles and this report concentrates on some of that action.

The scenarios of both battles were similar with Union forces attempting to cut Lee's line of retreat to the Potomac River crossings.  In the battle which I fought, the Confederates already held a strategic hill while in the other battle, the Union forces held the strategic hill.  The mission of the opposite sides were to either defend what we already had or take it from their opponent.

The Battle of Pine Hill pitted four brigades of Confederates under Lieutenant General James Longstreet against five brigades of Union troops.  John A. (young novice son of Jay A.) assisted me while we were opposed by Travis M. (overall Union commander) and Sean P. (my son).  On the other table Jay A. (overall Confederate commander) and Jerry Lee A. (his older son) fought a successful battle against the Union forces of Ed S. and Bill H.

Looking at the Confederate battle line with Pine Hill in the center upon which were placed two artillery batteries supported by a regiment of infantry.  John A. commanded a brigade of infantry and an artillery battery of the right (left of picture) while I commanded the center and left flank brigades.  We had the fourth brigade in reserve.

A full Union brigade of three regiments in column assaults the 4th Texas of John's brigade.  After a fierce struggle the Confederate regiment fell back precipitously, pursued by one of the Union regiments.  On the right, John's artillery battery lends fire support.

Sean P., a stone-faced Union commander, launches overwhelming attacks against John's other two Texas regiments.  After inflicting some casualties with their rifle fire, both regiments withdrew in front of the Union attackers.  Travis M. (back to camera) places casualties from his part of the Union forces back into their boxes.

The aftermath of a ferocious fight in the center.  After loosing his artillery battery to a Union assault, John counters with a furious counterattack by the 2nd South Carolina against two Union regiments.  The Palmetto boys beat both Federal regiments then turned against the Union regiment to the left facing the 17th Tennessee Infantry, scattering it with a fierce Rebel yell.

On the right flank, three of John's regiments from two different brigades face off against three Union regiments but in the background three more are moving around the copse of woods.

Meanwhile on the left flank I'm slowly withdrawing against very light Union pressure as I begin to send regiments to shore up the center and right of our line.  There were two Union batteries to my front and I didn't want to risk a mini-"Pickett's" charge against them.

At this point we stopped the action, with the umpire judging that the Union forces didn't have the strength to push our troops off the Pine Hill.  Travis' two Union brigades just couldn't close because he rolled lousy on his movement die rolls.  We decided that his troops had made a hard forced march the night before the battle and then encountered very muddy fields, slowing their advance.

I don't really know exactly what happened on the other table but the Confederate forces did successfully attack the Union held hill and severely beat them up, pushing them back along their front.  I know Ed S. took pictures so I hope he'll post them here shortly.

Wednesday, January 9, 2013

With Massena against the British

And here are some views and comments on our Fog:N game at Phil's from the French point of view.  The pictures and dialogue are courtesy of Phil.  Please click on the pictures for a larger image.

The 1st Saturday of the new  year saw some of the Jackson Gamers exploring the relatively new Field of Glory Napoleonic rules.   The scenario was a 1518 point French army  under Massena  versus a 1380 point British army under Wellington somewhere in the Spanish Peninsula.

Wellington has utilized a flank march with his British cavalry, whose presence, flowing  around and through the large village on the French left,  causes some concern for Massena.  In FoG-N a small unit of cavalry consists of 500-800 men.  The French are looking at least 2000 British sabres on their flank.  This brings them no cheer.


The French cavalry commander peels off one unit of dragoons to slow the British light cavalry moving left of the village.


The British heavy dragoons assault the French dragoons before them and break both units, depriving their attached officer as well of his continued existence in this game.  The légère in skirmish order on the right flee into the woods without a chance to fire upon the British cavalry.


The remaining French dragoons on the French left force the British light dragoons back.  But in their pursuit of the withdrawing British, they run into the KGL light cavalry who defeat the French in the resulting melee.

 
The leading French unit of the left-hand Corps waivers under very accurate British artillery fire.  Although the French have massed their artillery, they can accomplish very little with it.

 
After evading the British dragoons, the légère unit in skirmish order attempts a flank move through the woods, but they just can't quite get to the edge and into point-blank musket range.


On the far left, the remaining French dragoons flee from the victorious KGL cavalry who will catch them and break them.  The lone French cavalry general (center beneath village) has failed to rally a single unit.  The triumphant British cavalry are unopposed.  They are some 6 to 7 turns away from the French LOC (some 26” = a mile).  The French infantry to the right have begun to form square in anticipation of being attacked.


View from behind the French lines.  Their infantry is struggling to advance.  The large units of Portuguese and Spanish in the center of the British defense easily absorb the French fire.  On the British right their infantry have refused their flank to the légère in the rough terrain.  The remaining French cavalry on the far right (all light) try to weave between rough and difficult terrain.  Awaiting them are Spanish lancers and British light Infantry, who avidly await the chance to fire at them then evade, confident that the lancers will intercept any assault in their direction.  It is a first class defensive position for Wellington, & Massena now knows his effort is futile.

Saturday, January 5, 2013

With Picton against the French

For the first game of the new year, Phil hosted us at his house for an introduction to the Field of Glory - Napoleonic (FoG-N) rules.  The game pitted two small French corps with cavalry against two British divisions with cavalry.  Roger and I (Col Campbell) played the British against Phil and Ed as the French.

As the British commander, my comments are from their perspective.

Looking from behind the French right hand corps at the British defenses.  A KGL light brigade defends the small town in the center of the picture.
Each French corps had two divisions, each of three regiments, plus artillery.  For cavalry, the French had a dragoon division with three brigades and a light division with two hussar and one chasseur brigades.  Marshal Massena was the overall commander.

The British right flank is in the foreground with the French left hand division and dragoons deployed in the background.
The British had Picton's division with three British and one Portuguese brigades, plus artillery, and the 7th Division with one British light brigade, one KGL light brigade, and one Portuguese brigade, plus artillery.  The British cavalry consisted of two British/KGL dragoon brigades, one British light brigade, and one KGL light brigade.  There were also some Spanish - one infantry brigade, one light cavalry brigade, plus artillery.  Wellington was in overall command.

The far British right flank was composed entirely of cavalry with the two dragoon brigades on the left and the two light brigades on the right.  The three French dragoon brigades were beyond the town.  The French left hand corps can be seen stretched out in the left background.

The main French battle line with one corps in the right foreground and the other in the left background with the French light cavalry division on the horizon.


The center of the British line with Picton pointing with his trademark umbrella and Wellington right beyond him.  The French have advanced to the foot of the slope against Picton's Portuguese brigade and the Spanish brigade, but that was as far as they ever got!
On the British right I advanced the two dragoon brigades up to the corner of the town and then the French dragoons advanced closer to me - just what I wanted them to do!  In the background my two light cavalry brigades also advanced while a French dragoon brigade rode around behind the town to guard against being outflanked by them.
Over on the British left, Roger maneuvered the 7th Division's Portuguese brigade into a newly planted crop field to the left of the town.  The French division opposite him deployed all three regiments on line with a leger regiment opposite the Portuguese.  In the left background, the French light cavalry began an outflanking movement.  It would come to nought.
Picton's combined divisional artillery fires at medium range against a French regiment with six dice, getting five hits which results in the French wavering (two yellow rings).  They were really never able to recover from this pasting.  The British brigade on the right has been disordered from French artillery fire.
After the cavalry melee initiated by the British and KGL dragoons, the French dragoons are broken and flee the victorious British.  They could not be rallied and rode from the field.
To the right of the town, my impetuous British light cavalry brigade charged the French dragoons but came up on the short end and were forced back.  However the French didn't pursue very far and left themselves vulnerable to the KGL light brigade.
Back on the British left, the 7th Division's British light brigade has moved up to the left of the Portuguese and the Spanish light cavalry brigade has moved over behind them.  Meanwhile the French light cavalry move slowly closer.
A look down the opposing battle lines with the French right/British left in the foreground.  The French infantry never really got much closer to the British line than they are now.
The veteran KGL light brigade (being "played" by British light dragoons) charge the French dragoon brigade.
And send them fleeing for their very lives!  In five cavalry melees on this flank, the British won four of them.  I have never done better as a cavalry commander than I did in this battle!
A final look at the exposed French left flank with many of their regiments in square.  The British cavalry has an unopposed route into the French rear.  Massena decides that his day is done and begins a slow withdrawal.  Since the French are in square and the British cavalry is spent after all of the fighting they did, Wellington reluctantly lets the French fall back.
The objectives of the fight were the "exits" off the board for each side.  The French couldn't penetrate the resolute British-Portuguese-Spanish defense while the British cavalry had completely defeated their French opponents and had an open route to the French "exit."  We called the game at that time.

Ed also took a batch of photos.  I'll let him post them as a report from the French perspective.