On Saturday, February 19, we met to pit the might of the Russian Baltic Fleet against the Japanese Navy in the Straits of Korea (near the island of Tsu-Shima). After sailing half-way around the world, would the Russians be able to best their opponents who were fighting in their own backyard? Here's the tale. It has been a long time in preparation but I think you will consider it worth the wait. As usual, please click on the pictures for a larger image.
 |
| Photo by Jim |
The Russian 2nd and 3rd Pacific Squadrons (as the Baltic reinforcements were called) steam in columns abreast with the Cruiser Division in the lead, followed by the 1st, 2nd, and 3rd Battle Divisions (right to left), and then two smaller cruisers.
1st Cruiser Division: Oleg (division flag), Aurora, Dmitri Donskoi, and Vladimir Monomakh
Russian 1st Battle Division: Knyaz Suvorov (fleet and division flag), Imperator Alexandr III, Borodino, and Oryol
Russian 2nd Battle Division: Oslybya (division flag), Sisoi Veliki, Navarin, Admiral Nakhimov
Russian 3rd Battle Division: Imperator Nikolai I (flag), General-Admiral Graf Apraxin, Admiral Senyavin, and Admiral Ushakov
Attached Cruisers: Izumrud and Jemchug
This was the same formation in which the Russians began the Battle of Tsu-Shima.
 |
| Photo by Jim |
The Japanese Battle Squadron also assumed the same formation that it used to begin the Battle of Tsu-Shima, with three columns of cruisers leading the two heavier columns (battleships and armored cruisers on left and armored cruisers on right).
Japanese 1st Battle Division: Mikasa (fleet and division flag), Shikashima, Fuji, Asahi, Nisshin, and Kasuga
Japanese 2nd Battle Division: Izumo (division flag), Azuma, Tokiwa, Yakumo, Asama, Iwate
Japanese 3rd Battle Division: Kasagi (division flag), Chitose, Otowa, Niitaka
Japanese 5th Battle Division: Itsukushima (division flag), Chinyen, Matsushima, and Hashidate
Japanese 6th Battle Division: Suma (division flag), Chiyoda, Akitsushima, and Izumi
The Russians had 5 modern battleships, 2 older battleships, 1 obsolete battleship, 3 coastal defense ships, 1 modern and 2 obsolete armored cruisers, and 4 protected cruisers.
The Japanese had 4 modern battlships, 1 obsolete battleship (ex-Chinese), 8 modern armored cruisers, and 11 protected cruisers (about half modern and half obsolete).
 |
| Photo by Ed |
The opening moves saw the Russians steam straight ahead, probably to burst through the Japanese ships, inflict as much damage as they could, and sail to Vladivostok. The Japanese began to maneuver to open their broadsides, with their three cruiser divisions turning to starboard and the heavier ships behind them to port.
 |
| Photo by Ed |
As the Japanese cruisers continue on their sweep around the Russians, the lead Russian cruiser division gets into close range. Volleys are being exchanged and damages begin to mount.
 |
| Photo by Ed |
The three Russian battle divisions continued their steady advance, with the 1st and 2nd divisions steaming straight ahead, while the 3rd Division and its attached cruisers slowly swing to port to meet the advancing Japanese cruisers.
 |
| Photo by Jim |
Those ships that had targets open fire, some concentrating their fires and others firing at their opposite numbers. In the background, the Russian cruiser Oleg is on fire.
 |
| Photo by Jim |
The several Japanese cruiser divisions find a lucrative target, the Russian 3rd Battle Division, composed of one obsolete battleship (Imperator Nikolai I), which is turning out of the line due to severely reduced speed, and the three coastal defense ships - General-Admiral Graf Aprazin, Admiral Senyavin, and Admiral Ushakov. The Apraxin and Ushakov have been set afire by the Japanese shells.
 |
| Photo by Ed |
But the Japanese aren't immune to fires as the ex-Chinese battleship
Chinyen begins to burn. However, the efficient crew quickly puts out the fire.
 |
| Photo by Ed |
The Russian 1st Cruiser Division (foreground) is hit hard by Japanese shells. The cruiser Oleg (division flag) takes a number of hits that start two fires. The Japanese cruisers in the middle ground are also hit but the Russians only start one fire.
 |
| Photo by Ed |
The Japanese 1st Battle Division (background) and 2nd Battle Division (foreground) maneuver against the Russian battleships (out of picture to left). The Japanese armored cruisers are taking some hits but the range is still too long.
 |
| Photo by Jim |
Meanwhile over on the far left of the battle area, Japanese protected cruiser Akitshushima can't take any more hits and sinks in a cloud of steam. Two of her consorts are badly damaged and are turning away from the heavier Russian ships.
 |
| Photo by Ed | |
In the center, the Russian cruiser Oleg succumbs to Japanese shells and sinks in a cloud of fire and steam, taking the division commander to a watery grave. Fires still burn on a Japanese cruiser in the background.
 |
| Photo by Jim |
The Japanese cruiser Otowa, newly launched and having just joined the fleet, can't stand the heavy Russian shellfire and also sinks.
 |
| Photo by Ed |
Jim (left, Russian 3rd Division commander) and Jay (right, Japanese protected cruiser divisions commander) adjudicate shellfire on each other's ships. The battle between Jim's older battleship and coast defense ships and Jay's older protected cruisers was fast and furious all game long. The two friends have been gaming against each other since college days in the early 1970s!
 |
| Photo by Jim |
All of a sudden, world history on this timeline is changed! After the Oleg was sunk last turn, the cruiser Aurora takes the lead in the Russian 1st Cruiser Division column. But even this never-to-be historic ship can't withstand the concentrated Japanese gunfire and he sinks in flame and steam. Will the Russian Revolution ever start without the brave sailors from the Aurora leading the way? Of course it will!
 |
| Photo by Ed |
In the foreground, the Japanese armored cruiser
Azuma has her rudder jammed by a lucky Russian shell hit and turns out of the battleline. In the middle ground, the 1st and 2nd Russian Battle Divisions and the remnants of the 1st Cruiser Division attempt to maneuver around the Japanese 1st Battle Division (back ground).
 |
| Photo by Jim |
With the ex-Chinese battleship Chinyen taking fire in the foreground, the old Japanese cruiser Hashidate falls prey to the guns of the Russian 2nd Battle Division (off picture to right, see below).
 |
| Photo by Jim |
While the battleships of the Russian 2nd Battle Division target Japanese cruisers to their left, the next Russian cruiser in line, the obsolete Dmitri Donskoi, is hit too many times. Burning and belching steam, he plunges to Davey Jones' locker. In the background, two of the new Russian battleships are being hit by fire from the Japanese battleships.
 |
| Photo by Ed |
In the foreground, the Japanese 1st Battle Division maneuvers to stay between the Russian battleships and their far away refuge in Vladivostok.
 |
| Photo by Jim |
One of those new Russian battleships, the Borodino, is targeted by several Japanese battleships whose shells start a raging fire. With the bridge hit and funnels badly damaged, he still limps towards the Japanese battleships.
 |
| Photo by Jim |
Suddenly, the Japanese armored cruisers of the 2nd Battle Division become targets with fires started on three cruisers by Russian shells. But their well-trained crews quickly extinguish the blazes and they continue to maintain a heavy fire against the Russian ships.
 |
| Photo by Jim |
The Russian flagship, the battleship Knyaz Suvurov, is hit and begins to burn fiercely. Fortunately the crew responds heroically to the threats and manages to extinguish the fires in short order.
 |
| Photo by Jim |
Two Japanese battleships (Mikasa in lead and Fuji), although hit hard and ablaze, close on the beleagured Russian 2nd Battle Division. Even things look bleak for these four Russian sinks, none of them were sunk.
So who won this recreation of the Battle of Tsu-Shima?
The Japanese started with 4 modern battleships, 1 obsolete ex-Chinese battleship, 8 modern armored cruisers, and 11 protected cruisers (a mix of modern and obsolete). They lost all 11 protected cruisers either sunk or rendered combat ineffective and the ex-Chinese battleship and 1 armored cruiser were forced to withdraw because of damage. The Russians scored 65 points from this.
The Russians started with 5 modern battleships, 2 older battleships, 1 obsolete battleship and 3 obsolete coast defense ships, 1 modern and 2 obsolete armored cruisers, and 4 modern protected cruisers. They lost 1 modern battleship and all 3 coast defense ships, 2 obsolete armored cruisers, and 2 modern protected cruisers. The game master decided that two battleships (1 modern and 1 obsolete) wouldn't last the night against the Japanese destroyers. The Japanese scored 80 points from this.
While the Japanese won a tactical victory, strategically the action was a draw. The Russians were able to get 3 modern battleships, 2 older battleships, 1 modern armored cruiser, and 2 modern protected cruisers (half their ships) through the Japanese lines and to dubious safety in Vladivostok. The big question is whether the Russians will stick their noses out of Vladivostok to engage the successful Japanese. Only time (and another game) will tell!
 Here we are setting up the terrain. You see Jay (taking the picture), game master Ed, pirate captain Jim and captain Phil.
 Another view of the village, from the direction most of the pirates will approach.
 Here we see the British marines patrolling the island.
 This is the other part of the British marine company.
 Some of Phil "Black Bart" Bligh's sailors
 Russ' Spanish militia advance on the village.
 The pirate crew of 'Red' Sonya enters the board.
 awkins' crew attacks the Royal marines.
 art of the melee one British unit
 mmander Russ
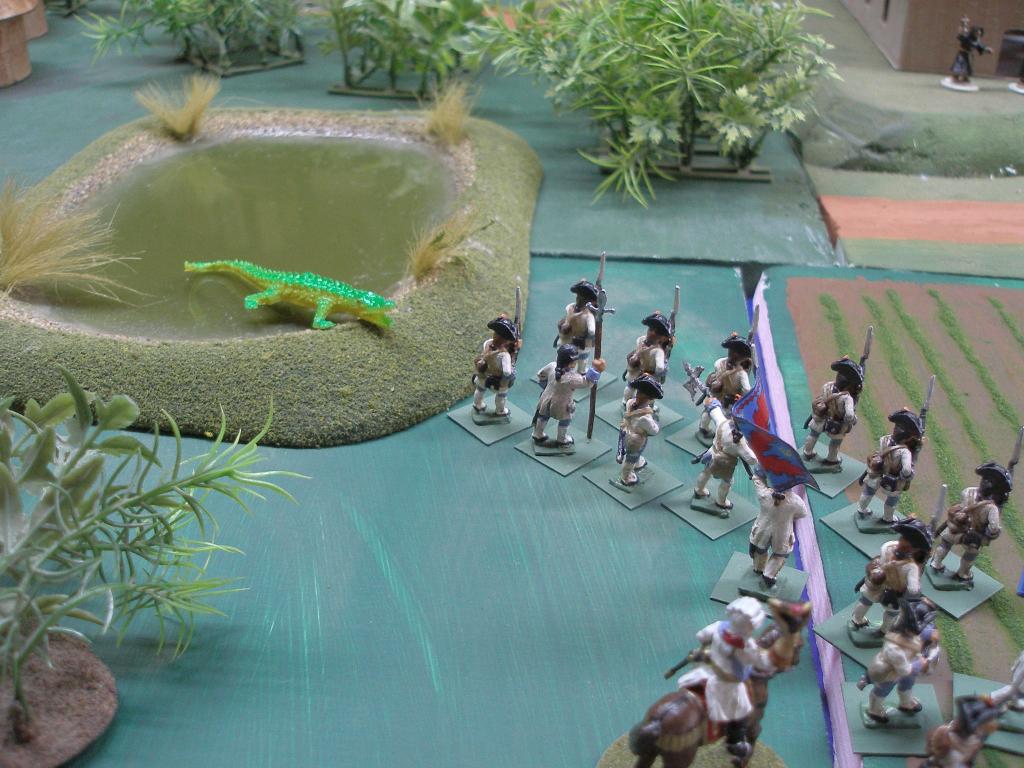 Russ' Spanish push toward the village, avoiding
 Part of pirate 'Red Sonya's' (Jim) crew sneaks toward the mission. They try and keep a hill between them and the British marines and avoid the alligator.
 The fight at the village takes on a new dimension
 At the end of the game 'Red' Sonya's crew captured


